
Get Naked!
 |
| Here's the look for the tutorial: golden brown smokey shadow |
 |
| Everything I used for my eyes |
The most beautiful Palette in the world: Urban Decay Naked Palette
 |
| Colors used: "Half Baked", "Smog", & "Darkhorse" (numbers = order used) Bonus: you can use #4 "Virgin" as highlight color & "Creep" instead of black liner in crease |
 |
| Prep naked eyeballs with Urban Decay Primer Potion all over lid |
 |
| UD "Half Baked" all over lid with Coastal Scents Classic Shadow Dome Natural Brush |
 |
| UD "Smog" in crease Go about 3/4 of the way, don't apply dark amounts of shadow all the way to tear ducts Brush I used: Sephora Collection Classic Rounded Crease Brush #13 |
 |
| UD "Darkhorse" in outer V of crease and outer 1/3 of lid. Continue using: Sephora Collection Crease Brush #13 |
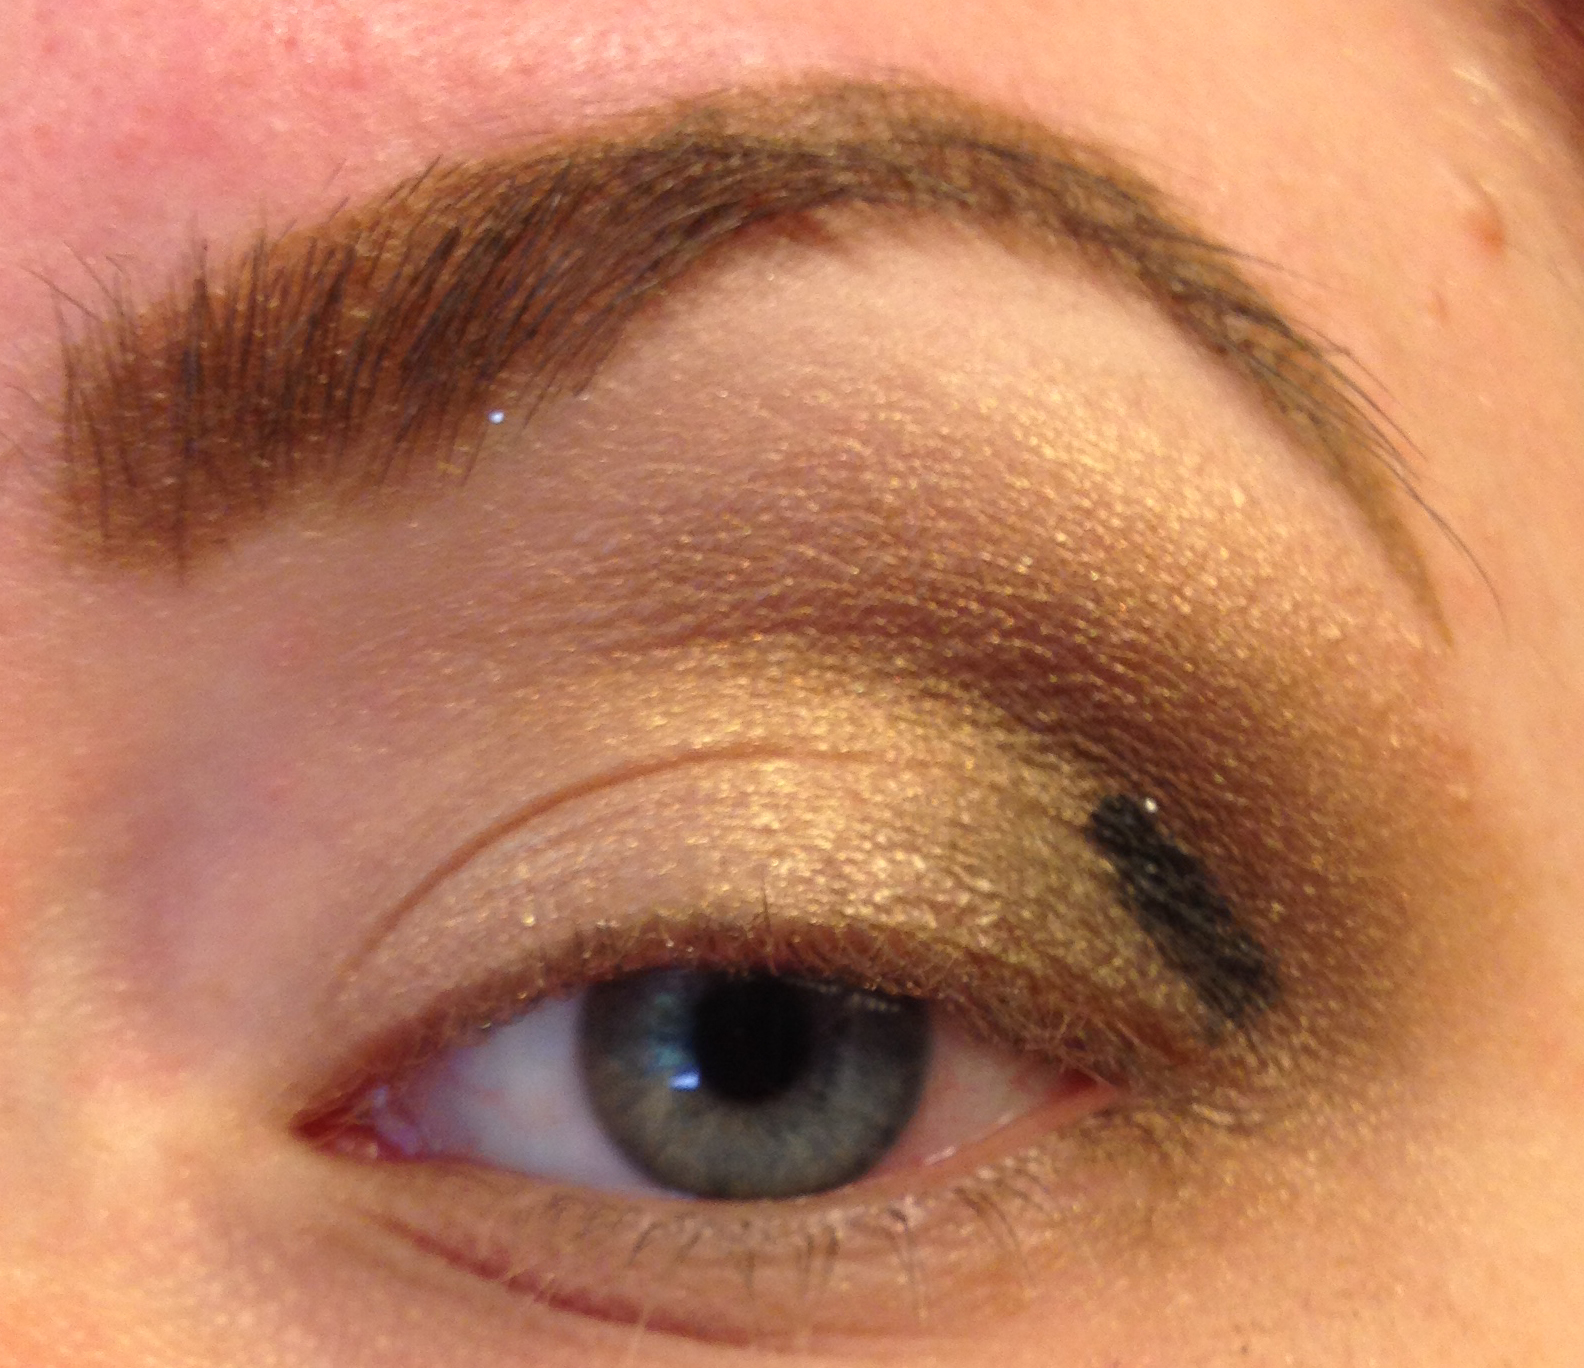 |
| Add deep black eyeliner to outer corner of crease (positioning shown here) & blend out BEFORE it dries |
| Pencil I used: Sephora Collection Waterproof Jumbo Liner in "Black" And blended out liner with my favorite tiny brush: Coastal Scents Classic Small Natural I like using a liner in this case because it is much more pigmented than a matte black shadow, and a little easier to focus the black in one area |
 |
| Blended liner into crease: yours may not be this smooth the first time, don't worry! I botched this the 1st time I tried Also add Lorac Baked Matte Satin shadow in "Social" under brow bone |
TIP: work in a circular motion working the liner into the crease first then soften any outlines from the liner. Move quickly - this Sephora pencil dries ultra waterproof
I also went back with a little more UD "Darkhorse" Shadow with Sephora Crease Brush #13 and blended over the black liner a little bit more
 |
| Apply Sephora Collection Shadow in "Wedding Day" (shimmery white) to tear duct area & directly under eyebrow (can replace with UD "Virgin" from Naked Palette) THEN: Set up your cat eye: carve out a line with Q-tip + makeup remover. I usually use a full Q-tip for each eye, use it to remove all extra fall-out too |
 |
| Line upper lid with Clinique Brush on Cream Liner in "True Black" |
 |
| Bust out your favorite pen liquid liner. Mine = Kat Von D Tattoo Liner in "Trooper" |
 |
| Trace lower border of shadow, starting from outside and meeting up with lower lash line |
 |
| Start from outer tip of first line and connect down to upper lash line |
 |
| Fill in the little triangle gap! I layered the Clinique cream liner on top again for a more matte deep black |
 |
| Use angled shadow brush to apply UD "Smog" along lower lashline & UD "Darkhorse" layered over, keeping this shadow on outer edge of lower lashline |
 |
| Curl & coat! You're done!!! |
 |
| Benefit They're Real! Mascara loads of separation & definition! Rich black pigmet, too If you want to try it out, pick up your Birthday Gift from Sephora this year! There's a deluxe sample in the gift set for free! |


 ... And you're done!!
p.s. ignore crazy brow hairs, they need trimming or brow gel or something haha
Below pictures are in natural outside lighting